Custom tile shower design brings several decisions into a small space: where to enter, where to sit, how the enclosure meets the walls, and how the tile connects with the bathroom floor. This Alvesco Construction project shows those decisions taking shape through a built-in bench, a tiled half wall, patterned wall tile, and a contrasting shower floor.
The photographs below show construction stages before the final glass enclosure and all finishing details were in place. They are useful for seeing features that can be harder to understand from a single finished-room photograph.
Plan the bench as part of the shower layout
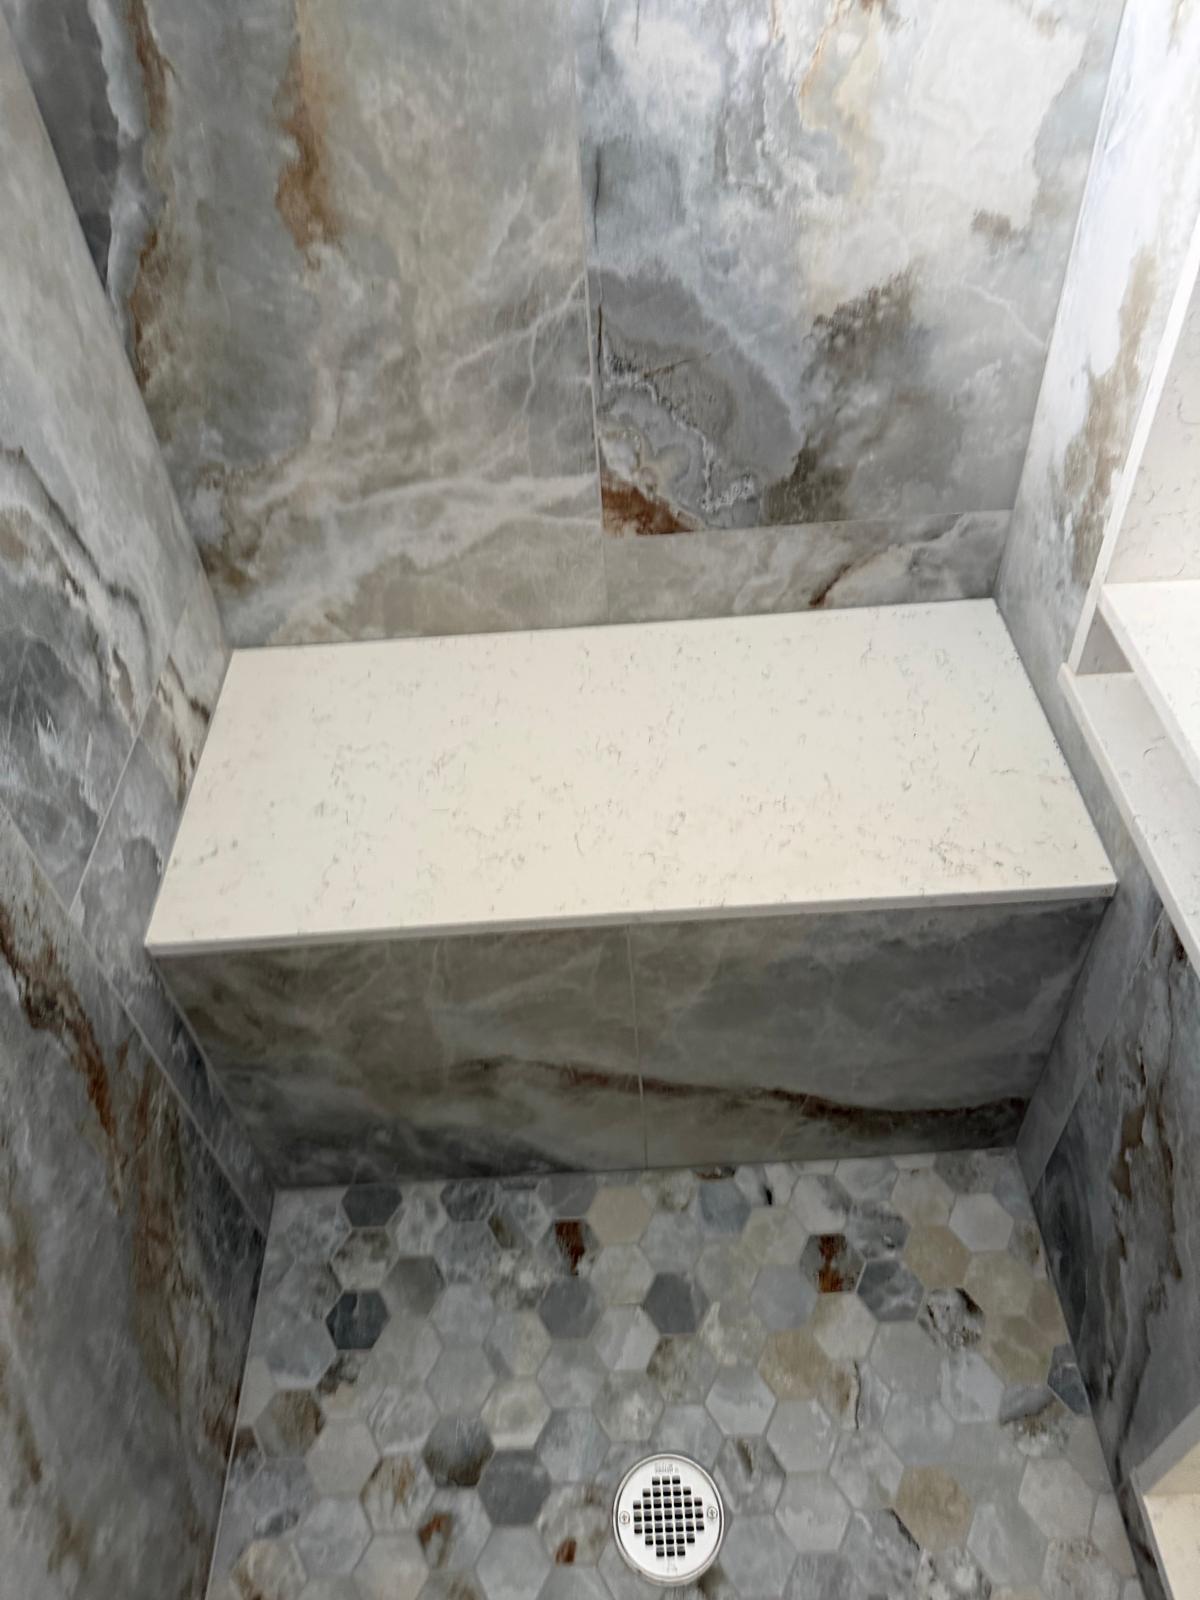
The bench occupies the end of the shower, with a light-colored top against darker patterned tile. Its position makes it part of the enclosure’s overall shape. A bench should be discussed when the shower is designed, including its depth, height, intended use, and effect on the remaining standing area.
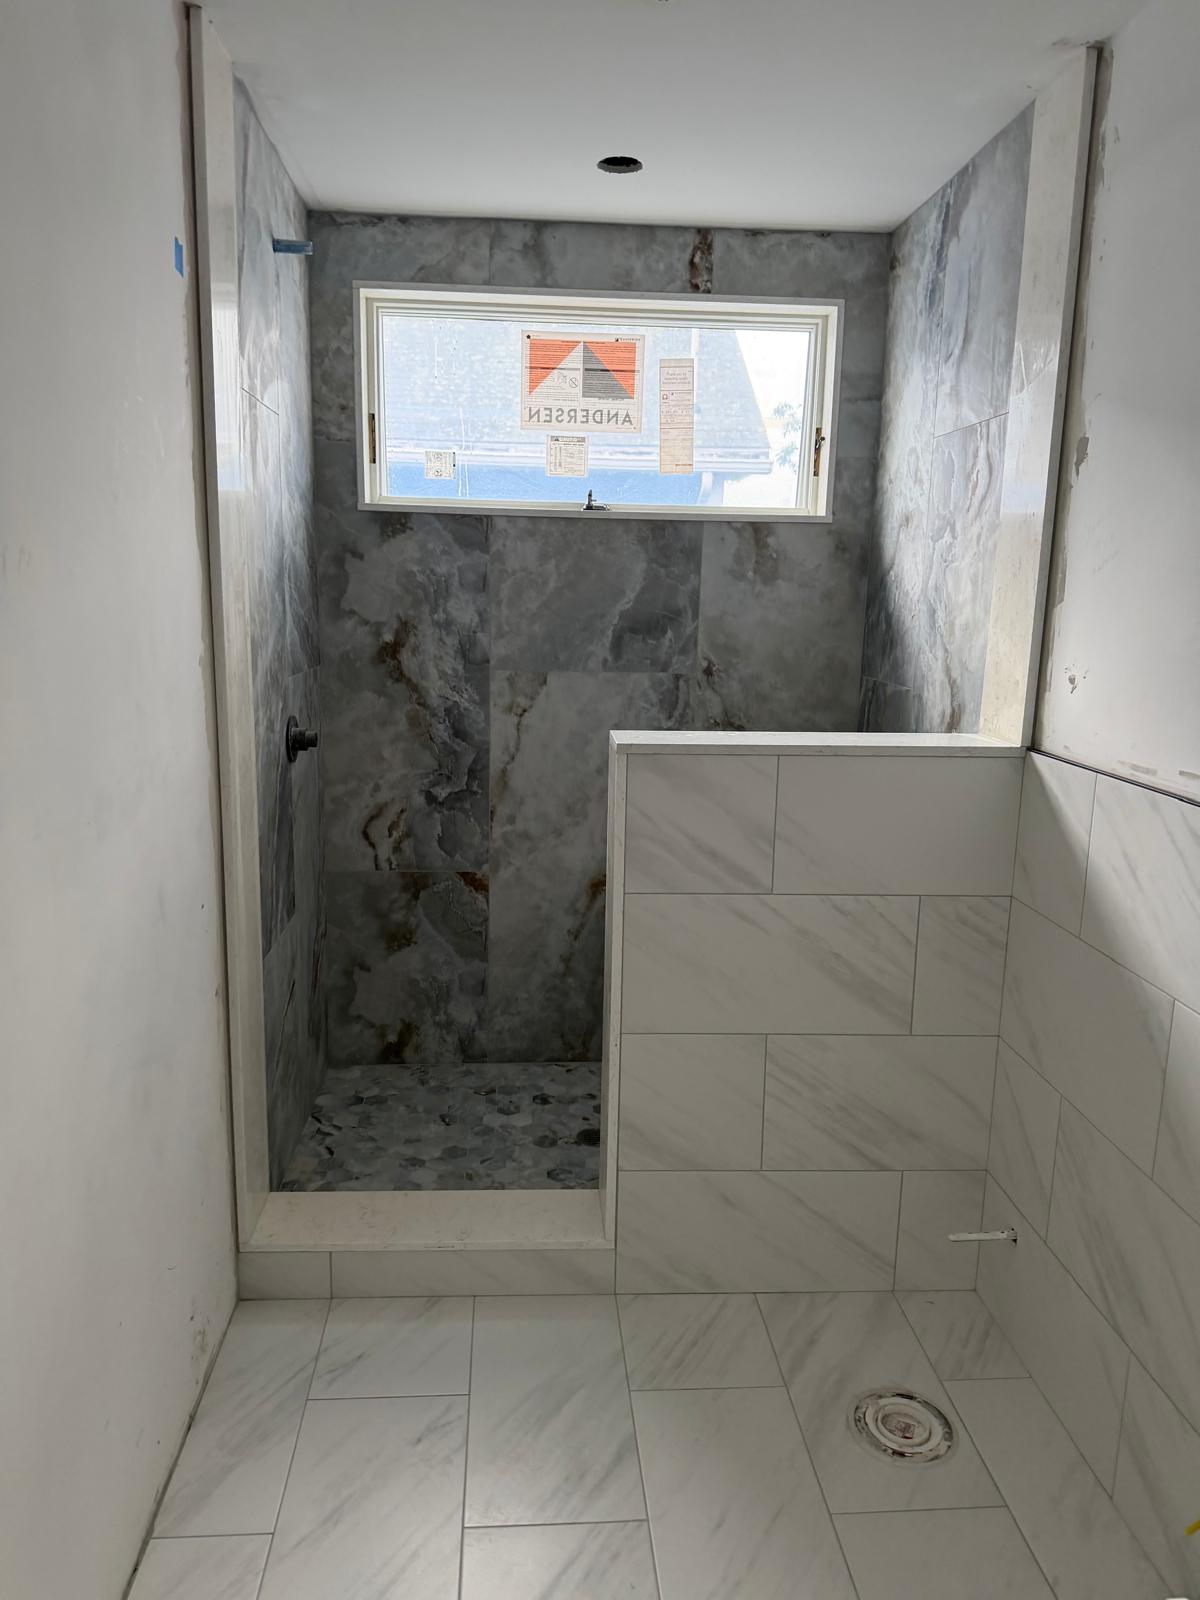
Ask your contractor how the bench will be built and integrated into the selected waterproofing system. The visible tile and cap are only the finished surfaces; the underlying assembly needs its own coordinated plan.
Use the half wall to define the enclosure
The half wall separates the shower from the rest of the bathroom while leaving the upper area visually open. In this project, light tile on the bathroom-facing side contrasts with the shower’s darker interior surfaces.
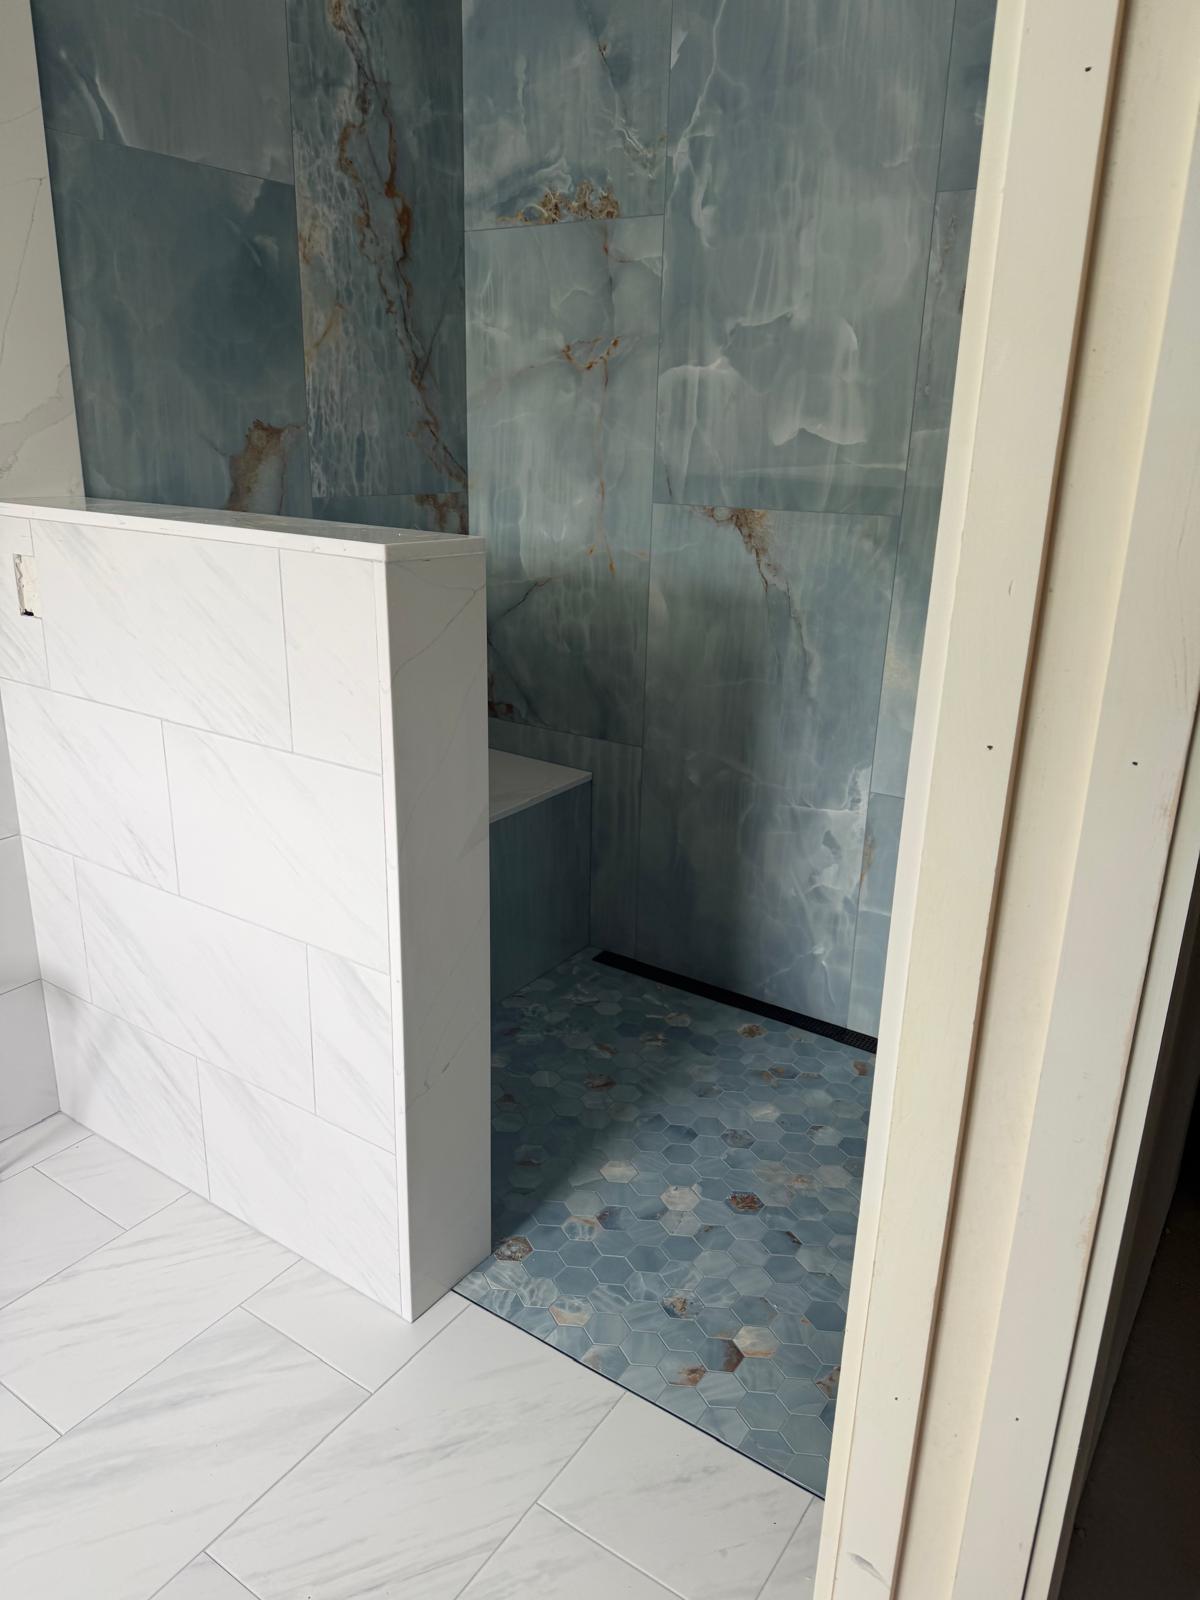
Its height, thickness, and finished top influence both appearance and glass layout. Decide how these parts meet before ordering the enclosure. The glass installer needs the actual completed opening and an agreed mounting approach.
Give the wall and floor tiles different jobs
The larger wall tiles create broad patterned surfaces, while smaller pieces distinguish the shower floor. Outside the shower, the lighter bathroom floor keeps the surrounding area visually connected to the half wall.
When selecting materials, review suitability for the intended wet-area use and the manufacturer’s care instructions. Appearance alone does not establish how a product should be installed or maintained.
Coordinate the window, fixtures, and glass
A window is visible at the back of this shower. Openings, corners, fixture penetrations, and the top of the half wall all need to be considered within the enclosure design. Review the waterproofing approach and finish details with the contractor rather than treating these as separate decorative decisions.
The later project walkthrough shows the glass enclosure installed. Comparing that view with these work-stage photographs helps explain how the half wall becomes part of the completed shower.
Bring the whole bathroom into the conversation
Shower entry, vanity placement, lighting, and circulation affect one another. Alvesco Construction can help coordinate custom shower work with the broader bathroom renovation, so the room’s construction and finishes are planned together.
See the Reading addition photo journey and walkthrough video.
Planning an addition or interior renovation? Contact Alvesco Construction to discuss your home, priorities, and construction scope. Licensed and insured, serving Greater Boston, the North Shore, and Central Massachusetts.